I've restored cars. I've restored pick up trucks. Can't even begin to fathom the number, it's in the hundreds. All were painted. The vehicles I intended for resale, I hired a long time painter friend to lay down the paint. Many I painted myself. We used state-of-the-art spray booths with side and down drafts. SIngle stage paints back then, with clear coats. Only once did I make the mistake of painting a friend's car in his warehouse space. He wanted it done cheap ... and all the dust from the roof girders made it cheap all right.
Many years later, I ended up with a ground up restoration of a small pick up truck. It was my own Ford Ranger FX4. I had bought it from a used dealership and got taken to the cleaners. The truck looked good, but it was one of those recent paint jobs designed to last until it drove off the lot. Lots of bondo, lack of metal. The truck bed (the back portion) had its rusted out mounts bondo'd ... no metal added to make sure it was safe, just bondo that gave way within one month. Ditto with the bottom of the doors and fenders. I ended up replacing the bed, two of the doors, and both fenders. I called it the "Franken-Ford". The parts weren't all from the same donor vehicle. The original truck was blue, the bed was red, the doors were a mix of black and white. And, of course, primer grey and primer red all over. I wanted it one colour, and I wanted it to look a bit better than half decent. I painted it black, by the way. A beautiful black.
 The truck and the work were a diversion for me. A way to distract me from my health issues. I had lost 112 lbs in a bit less than 4 1/2 months. My pancreas decided to retire. The pain, weight loss, and newly diagnosed with diabetes (pancreas makes the insulin, pancreas stops - so does the insulin). My budget was meagre. I decided to use rattle cans (spray paint). Now, I've painted cars and trucks before and know that the key to a good paint job is a fine mist, proper distance, consistent air pressure, and consistent movement of the spray pattern from the object. The spray pattern has a lot to do with it, but it's not critical if you understand the other attributes. After several brands, I settled on using twof of Rust-O-Leum's brands: Professional series, and Automotive series. Both of these offer finer clean mist patterns (fine with no splatter) than all the other paints, offered consistent pressure until all the paint was gone and offered quick drying with no sagging. The latter part, quick drying and no sagging, are important if you are not using a spray booth. You have to paint faster (it's drying quickly, you need to overlap wet paint) but the quick drying means a lot less concern about dust and specks landing and sticking in wet paint. I painted as many parts of the Ford Ranger FX4 in my clean garage, at least as many as I could remove and handle. The hood, fenders, all four doors, tailgate, and all fender flares. The rest of the truck (bed and body) I painted right in the driveway – I chose the most wind-free day I could and late afternoon (and early evening) to minize extra heat drying the paint faster than it should. Turned out a lot better than I expected. Once dry, I did buff out the paint to make it look more professional (with the help of my brother-in-law, a detailer specialist – thanks Barry).
Painting a bike, then, shouldn't be that difficult. As background, this bike is fairly new. It was purchased by my grandson and rode lightly. It ended up damaged when he moved away to attend university in Windsor. His brother asked to borrow it and ended up with some serious damage to the rear wheel. The wheel was lost in the accident, the rear derailleur damaged beyond repair, and the derailleur hanger snapped off. Fortunately, the hanger was replaceable and the frame was not bent. I did repair all of this damage and replaced the rear wheel and added a mid-range quality derailleur: a Shimano Altus with a new Shimano 8-speed shifter.
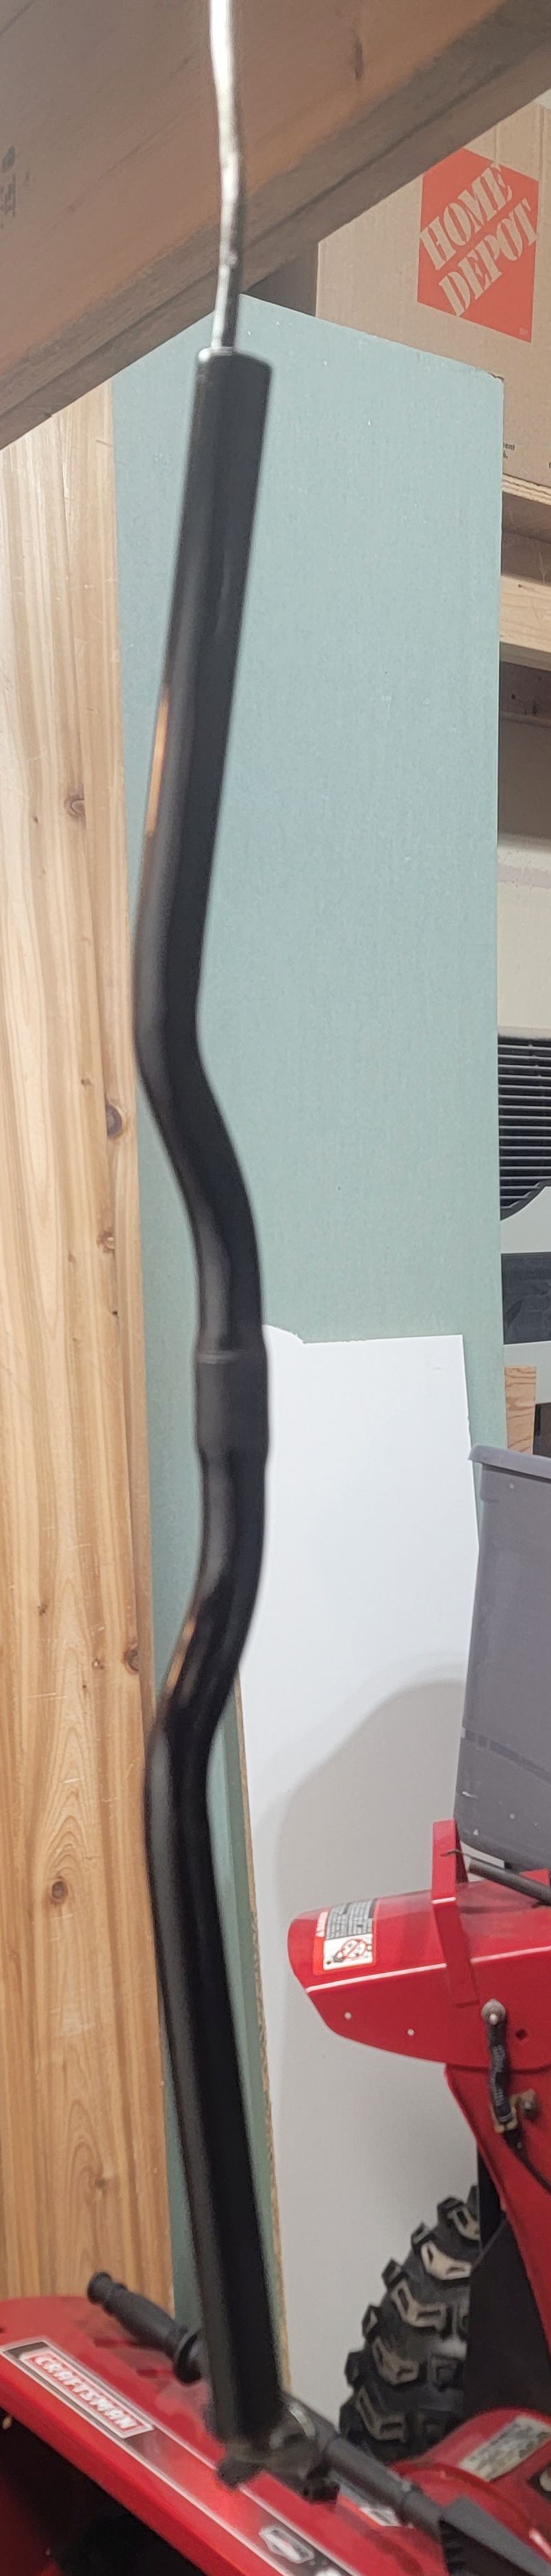
 I am starting with small parts to see how this all works out in my garage. Have a look at the upper right. That's the handlebar. It's hanging from a rafter so that I could paint the entire surface without touching it. The handlebar still had the store sticker on it. Part of the paint, particularly the front and top, had faded paint. I cleaned and sanded it thoroughly. The handlebar stem (that's the part that holds the front forks in place and positions/holds the handlebars) was scuffed, so I decided to clean and sand that too. It's shown at the left. I also used wire to hang that from the rafters so it could be sprayed without any repositioning needed.
You can't see it that well from these pictures, but the paint looks amazing. No dust, no specs, no orange peel. I'll be putting it back on the bike later today.
I had originally thought that a Candy Apple Red or Candy Apple Green would be ideal for this bike. I've decided against that though, the main portions of the bike will be black with lime green and white highlights. That will make it a lot easier to touch up. This isn't a show bike, I want to use this on a regular basis, and it will get some scratches and scuff marks.